Sunday, April 12, 2015

Motivatonal Message | #1

'Seek your own happiness'


Morning, young ones! My university semester is over, and my goodness does it feel nice to be back typing on this little blog again. My window is open and I can feel the heat of the sun on my skin; i've got a lovely candle burning; and i'm wearing Birkenstocks: today will be a good day. 

My second year at uni has been really hard, and I have been very unhappy. My journalism training course has pushed me beyond my comfort zone, leaving me lost and confused; I have been unbelievably homesick; I have been struggling to see any sort of future path following my degree; and one of my closest friends left to move to Denmark for a semester. For me, the easiest path appeared to be wallowing in my own self-pitty and be as negative as humanly possible. I left university at any available opportunity, and allowed any sense of self-confidence I had developed during first year to dwindle to non-existence. 

I was sad, confused and, above all, isolated from any sources of happiness I may have found at university. However, this isn't all doom and gloom, as second semester began I decided to actively seek my own happiness and attempt a sense of positivity: 

- I decided to make the most of my course. Yes, I didn't want to be a hard-core news junkie. But I did adore writing about food, and decided to seek a career path surrounding this. From this, I began to constantly consume food media: and developed an interest as to how food appeared on the page and screen. I pushed myself out of my comfort zone and enrolled in a food styling and photography course, and began to find a side of the media industry that I really felt passionate about. From this, I realised that there is always another side to your own unhappiness, and always a path to make it positive.

- I started to take control of my own happiness, and grab opportunities with both hands. Something which had always frightened me about university life was the notion of societies, and society culture. However, I discovered that not all societies involve scary drinking initiations and wild tour tales. I started Yoga, which I swiftly learned to adore, and began to develop an interest in the conditioning and strength of my own body. And whereas before I used yoga as a substitute for the dance training I used to do so rigorously, I now take the time to consider my own practice: and actively seek to improve the quality of practice. Alongside this, I also took the scary leap to begin dancing again, and started to take a Ballroom and Latin class once a week. And, my God, I can't even begin to explain how good it feels to be dancing again! From this, I learnt that not all opportunities are bad, and sometimes great rewards come from pushing yourself out of that little bubble of comfort and security.

- I made friends, and chose not to brush aside all social invitations. Whereas in first year, I mainly socialised with my flatmates, this year I made friends on my course: and jolly wonderful friends they are too! For the first time ever, I feel supported and truly happy, and am surrounded by a group of people who bring out the very best in me. From this, i've learned that there is more to socialising than getting drunk at a sticky club, and that there will always be like-minded people who want your company just as much as you want theirs! Surrounding yourself with positive people will always, always make you more happy. 

So that's it, just a few things I have chosen to do recently to make me oh-so happy and take control of my own positivity. This is the beginning of my Motivational Message blog series that I intend to post every Sunday, with a different nugget of happiness each week. 

Keep smiling!


Wednesday, September 24, 2014

Blackberry and Apple Jam


After picking half of the ingredients for this in the field opposite my house, I think this officially wins the award for the cheapest jam to make in the world ever. And, I must say, bar having to navigate the dog poo minefield, I rather enjoyed spending my morning staining my fingers lucid purple as I picked soft, juicy blackberries from their prickly branches (in the words of my boyfriend, it was very 'good life' of us!). I think jam makes a perfect present, and something like this is ideal for a tight student like myself: easy on the purse strings, one might say. Leaving those all important funds for the stuff that matters, like cherry sours and WKD... or whatever you youngsters drink today.


Ingredients

1kg of blackberries (about 2 large bowls, unless you happen to have kitchen scales to hand when picking...)
1kg of cooking apples. Cored, peeled and chopped.
Juice of 2 small lemons
2kg of jam sugar

To begin with, you need to sterilise your jars. If you don't know how to do this, check out my post about apricot jam here for step-by-step instructions.

Put your chopped apple and washed blackberries into a large pan, pour over the lemon juice and 200ml of water. Simmer gently for around 15mins, or until your fruit is soft, pulpy and smelling how I imagine Mary Berry to smell (sweet and fruity, just so you know). In the mean time, shove a couple of saucers into the freezer, in order to check for setting later.

Take your jammy pulp off the heat and stir in all the sugar (brace yourself, it's a lot). Place back on the heat and stir until all your sugar is dissolved and then boil rapidly for 10 minutes. Check for setting by putting a dollop of jam onto a chilled saucer, pop back in the fridge for 3 minutes, and then slide your finger through the mixture. If it forms distinctive wrinkles, then bingo, your jam is set! If not, boil for another 5 mins and try again.

Once your jam is a delicious, deep purple and has reached it's setting point, ladle into sterilised jars and seal quickly so a vacuum is created. Feel free to go as camp as possible on decoration, I just went for brown paper, twine and labels to match my blog... but you can be way more creative than that. 

Sunday, August 10, 2014

Saturday Snapshots | #2


Today was a picnic kinda day... and what a picnic we had. As I had the day off work today, Toby and I decided to pack a picnic (French bread, chorizo and cherry tomatoes, to be precise) and drive up to Westbury White Horse, near to where I live. I admit, it was a little blustery and we had to dodge the piles of sheep poo in order to lay the picnic blanket down, but it was nice. Sometimes I find an hour or too away from civilisation, and the screens we are slaves to, makes the day a little bit nicer.


I had some water drinking issues...

After our lunch, we decided to go on a walk across the hills. Bar a few sheep,  it was pretty bereft of people around the far side of the Horse and the view was quite beautiful. I often forget how lovely Wiltshire really is, and the sea of bronze and green fields, lightly dappled with cottages and combine harvesters made quite the sight. 


Naturally, we had to end the day with an ice cream (thanks, Margret Thatcher!). And just as it started to rain, we decided to make like the old people by sitting and eating them in my car! Although we lacked curling cheese and pickle sandwiches and a flask of tea, I think the effect was still there...


How did you spend your Saturday? Was it as elderly as mine? 

Friday, August 8, 2014

Apricot Jam


I am going to become the youngest member of the W.I. And no, I feel absolutely no shame about this. From learning to cook at both my Grandmother's and Mother's knee, watching them both make jam always held a certain allure. Seeing that bubbling, oozing, fruity and sugary mixture on top of the hob, before being funnelled into shiny, hexagonal jars, always filled me with wonder. From a young age I have been of the belief that only really good cooks can make jam. Only cooks with real patience, concentration and Mary Berry levels of skill can make this properly setting and wobbly condiment. I can now safely say that this is bollocks. Because if I can make jam, anyone can. (Sorry, Grandma).

Ingredients (makes about 9 jars) 

2 kg of fresh apricots, quartered and stoned. (Don't under-estimate how many apricots make up 2 kilos... because it is a lot. I mean a bag-splitting embarrassing-self-in-geen-grocers quantity!)

Juice of 2 small lemons

500ml of water

2 kg of caster sugar


First things first, here's how to sterilise your jars, because you don't want no mould setting up camp in your lovingly made jam, no sir. Wash your jam jars in really hot soapy water, rinse and then pop in a pre-heated oven at 130C for at least 20 mins. You need your jars to be hot when your pour the jam in, so it's best to just turn the oven off and leave them in there if you are still making your jam.

Whilst your jars are sterilising, pop your apricots, lemon juice and water in a large saucepan on the hob and bring slowly to the boil, stirring occasionally. Once boiled, reduce the heat and simmer gently for 15 mins, or until the fruit is really soft and pulpy. Oh, at this point you should also pop 2 or 3 saucers in the freezer, ready to test if your jam is set later on.

Remove from the heat, stir in the sugar until disolved (I know it looks like a lot, but I promise you won't put people into a diabetic coma). Place back on the heat and boil rapidly for 15 minutes.

GRANDMA TIP - Clip a clothes peg onto your wooden spoon so it doesn't fall into the boiling vat of jam. Therefore avoiding a jam-on-hand 3rd degree burn situation. 

Next you need to test your jam for setting. Take the jam off the heat and dollop a spoonful onto a pre-chilled saucer. Chill for a further 3 minutes and run your finger through the mixture, if it clearly wrinkles, then it's set. If not, boil rapidly for another 5 minutes, then test again. 

Once your jam has reached it's setting point, remove your warm jars from the oven and funnel in the jam mixture. Seal immediately with either a wax disk and a plastic cover, or a tightly fitting lid. And thats it, jam done! (Gingham fabric tops are optional... but I think it really gives that over-priced farmers market/ Women's Institute feel). 


Sunday, August 3, 2014

Banana and Nutella Loaf


List of good things: 

Bananas (check)

Nutella (check)

Cake (check)

Baking to make other people happy (check)

Hello little'uns! I hope you have been enjoying the sunshine. Today I spent my day off from work reading in the garden, making copious amounts of apricot jam and, of course, baking this lovely loaf cake. Banana bread is good on it's own, but then with added Nutella... holy moley, it's a whole other yummy French layer of nutty-chocolatey-gooey goodness. This loaf is delicious on it's own, or with a scraping of butter. *Brushes cake crumbs off laptop* it won't last long in this house...


Ingredients:

5 small/ 4 medium mashed, ripe bananas
128g of light muscovado sugar 
100g of unsalted, melted butter
60ml of milk
2 large eggs
2 cap-fulls of vanilla extract
360g of plain flour
2 tsp's of baking powder
1 tsp of salt
60g (or two generous dollops) of Nutella


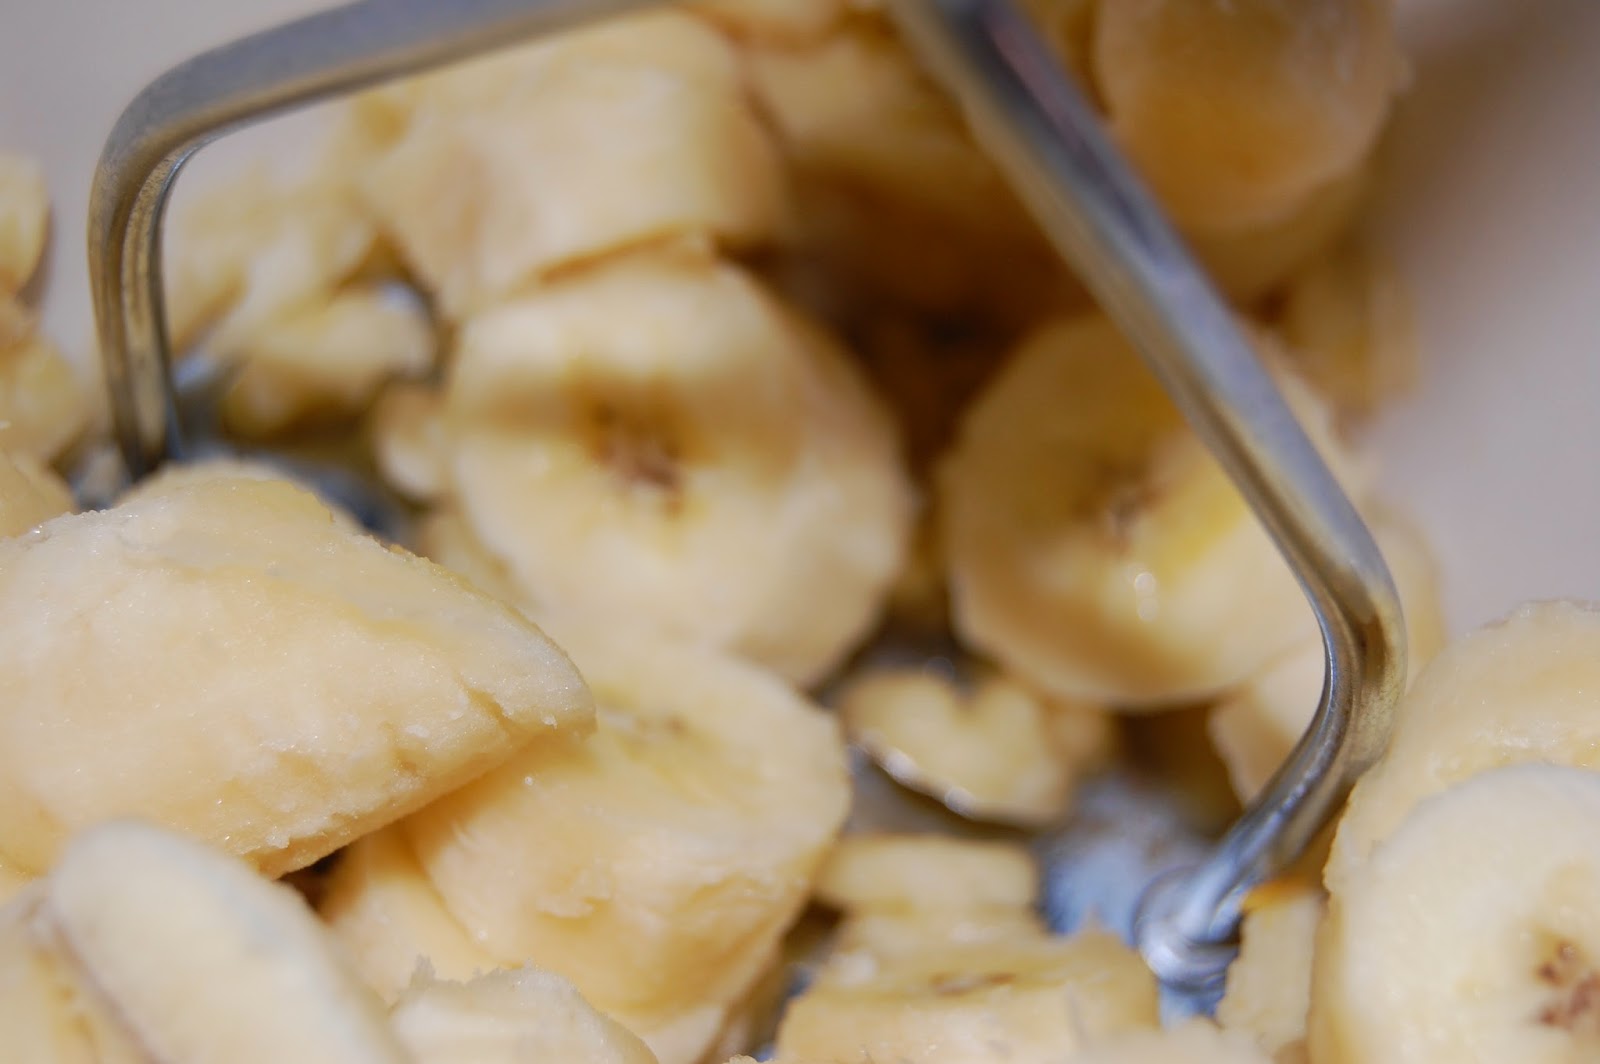
Pre-heat your oven to 180C and roughly peel, chop and mash the bananas (leaving a few lumps) and set aside. In the mean time, combine sugar, melted butter, milk, eggs and vanilla extract in a large bowl with an electric whisk, or in a free standing mixer (this was a perfect opportunity to get out my beloved aubergine-coloured KitchenAid, Florence). Sift in the flour, baking powder, salt and mashed bananas, and whisk briskly to combine.

You need your Nutella to have a slightly runny consistency, as it's a little too thick straight from the jar, so I just popped two generous dollops in a microwaveable saucepan and heated on high for 20 seconds. Once suitably runny, drizzle 2/3's of the Nutella over your cake mixture, and fold gently through using a rubber spatula. You still want the ripples of chocolate to be visible when you cut through the cake- so don't go too wild with your stirring. Transfer into two lined and greased loaf tins, and drizzle the remaining Nutella over the top, swirling gently with a knife.


Bake in a pre-heated oven for 30-40 minutes, or until a skewer comes out clean when inserted into the middle of the cake. Devour the first one, still warm from the oven, with a large cup of coffee and lovely company. The second loaf can be devoured when the time suits, or given away as a gift... but only if you really really like the person, because this ain't a cake for wasting.


Saturday, August 2, 2014

Four things to {Cook} this month | #1


             Blueberry Dutch Pancakes  


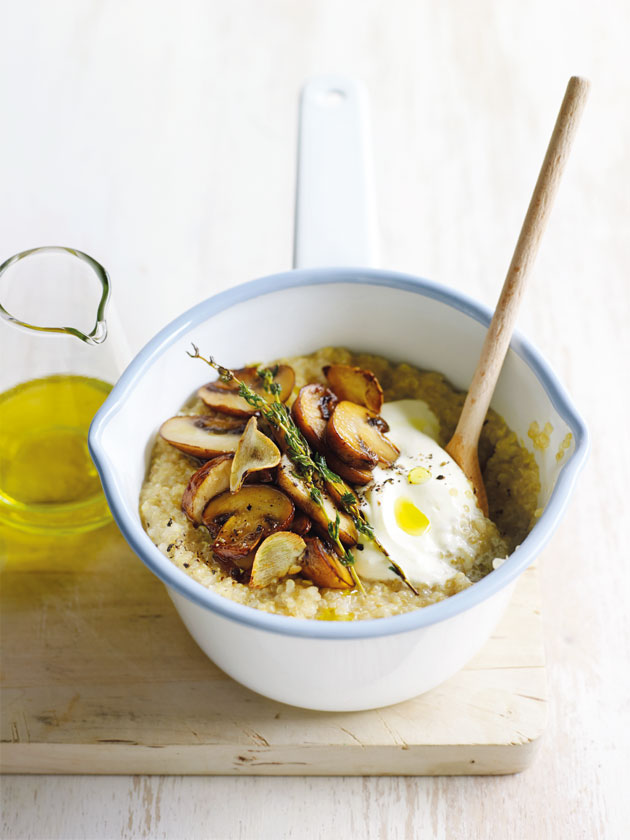
           quinoa, mushroom and thyme risotto


1. Breakfast | I am attempting to expand my pancake repertoire. After discovering last month that I can make the best American Pancakes, my boyfriend and I are in constant competition as to who can make the fluffiest pancakes with the most interesting and delicious flavour combinations. These Dutch Blueberry pancakes look like a winner to me, and they look so beautiful in their individual cast-iron pans. 

2. Lunch | As has been mentioned in previous posts, I have a serious case of Scandimania. Hence why I can't wait to make my own versions of Smorrebrod: dark rye bread, topped with a selection of delicious toppings. I personally want to try cream cheese, hot smoked salmon and Danish pickled cucumber. I can't wait to try these properly when I spend my Christmas in Copenhagen and Oslo this year! 

3. Dinner | I love risotto, but I find the gluten in the rice often leaves me feeling stodgy and needing to nap in front of trashy TV for at least 3 hours! This version made with quinoa and loads of fresh mushrooms looks so much lighter but equally filling. I can't wait to try this for dinner when I go back to Uni in September. 

4. Bake | It's no secret that I love baking. But as my skills develop, I'm looking to experiment a little more with new flavour combinations, and stray from the confines of traditional recipes. This classic lemon cake is sexed up with sprigs of fresh rosemary and a tangy, yoghurt icing- the sort of thing I would love to make in my own kitchen! 

Saturday, July 12, 2014

American Banana Pancakes


Pancake on Make A Gif

Mornings with pancakes are the best mornings. Especially American style pancakes with their soft, fluffy and sweet interior. These are so easy to make, in my opinion, way easier than traditional flat pancakes which always look like sloppy scrabbled egg when I make them! I had my pancakes with a drizzle of honey, some extra sliced banana and a few ripe, juicy raspberries... and then devoured them inelegantly in the garden with a big'ol glass of OJ. Perfect.


Ingredients (for 3 normal people, or 2 with a healthy appetite)

135g of Plain Flour
1tsp of Baking Powder
1/2 tsp of Salt
2 tbsp of Caster Sugar
140ml of Milk
1 Large Egg
2 tbsp of melted butter, plus extra for cooking
2 Ripe Bananas, roughly chopped

Sieve your flour, baking power, salt and sugar into a large bowl. Melt your butter in a medium sized measuring jug, then pour in the milk and crack in the egg, whisk quickly with a fork to combine. Add to the dry ingredients, along with the chopped banana. Stir together with a fork until combined and leave to stand for a few minutes.

In the meantime, heat a large frying pan on the hob (I used one big enough to cook 2 pancakes in at a time). Melt the butter and ladle two blobs of mixture on opposite sides of your frying pan. The mixture will be quite thick, don't panic, this is normal. Once the pancakes start to bubble on the top, flip over quickly (stealth and speed is key here) and cook for another 40 seconds or so on the other side. Transfer onto a plate and keep warm in the oven until the rest of your pancakes are cooked.

They should be about 1cm thick and with lovely golden brown speckles on either side. Devour at your own pace.


Blogger Template designed By The Sunday Studio.